Copyright 2010 by Letitia Sherriff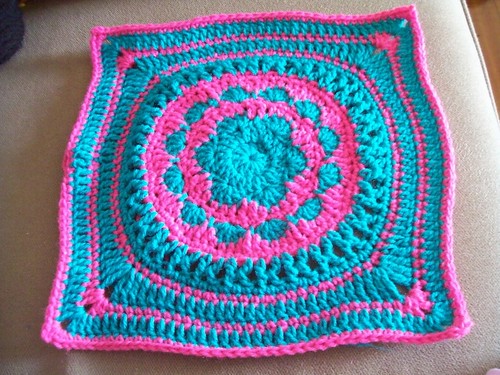 Materials Used
- Carnival 8ply Acrylic in Turquoise (Colour A)
- Spotlight Marvel 8ply Acrylic in Hot Pink (Colour B)
- 4mm crochet hook
Pattern written using US crochet terminology
Stitch Guide
Treble Cross (Trx) = Yo twice, insert hook in next st, yo and pull up a lp (4 lps on hook), yo, draw through 2 lps (3 lps on hook), sk next st, yo, insert hook in next st, yo and pull up a lp (5 lps on hook), [yo, draw through 2 lps] 4 times (1 lp on hook), ch-1, yo, insert hook halfway down st just made in space where lower legs join, yo and pull up a lp, [yo, draw through 2 lps] twice.
Odyssey 12 inch SquareCh-4, join with a sl-st to first chain to form ring.
Round 1: With Colour A... ch-3 (counts as first dc), 11 dc into ring. Join with sl-st to beg ch-3. (12 dc)
Round 2: Ch-3, dc into first st, 2 dc into each remaining st. Join with sl-st to beg ch-3. (24 dc)
Round 3: Skip first st of round 2, *5 dc into next st (shell made), skip on st, sl-st in next st, skip st,* repeat from * to * 5 times, sl-st to beg of round (6 shells). Finish off Colour A.
Round 4: Attach Colour B in the middle (3rd) stitch of any shell. Ch-1, *sc in same st, hdc, dc, tc, dc, hdc.* Repeat from * to * 5 times. Sl-st to first sc. (36 sts)
Round 5: Ch-1, *sc in first sc, sc in second st, 2 sc in the next stitch*. Repeat from * to * all the way around. Join with a sl-st to first sc. (48 sc). Finish off Colour B.
Round 6: Attach Colour A with a sl-st in first sc of round 5. Skip first sc of round 5, *5 dc into next st (shell made), skip one st, sl-st in next st, skip st.* Repeat from * to * 11 times, sl-st to beg of round (12 shells). Finish off Colour A.
Round 7: Attach Colour B in the middle (3rd) stitch of any shell. Ch-1, *sc in the same st, hdc, dc, tc, dc, hdc*. Repeat from * to * 11 times. Sl-st to first sc. (72 sts)
Round 8: Ch-1, *one sc in each of the first 4 sts, 2 sc in the next st.* Repeat from * to * all the way around (13 times). Finish off the round with one sc in each of the last two sts. Join with sl-st to first sc. (86 sc). Finish off Colour B.
Round 9: Join Colour A in any sc of round 8. Ch-4, Trx in next st (see special stitches). Repeat with Trx's around. In second to last stitch... yo twice, insert hook in second to last st, you and pull up a lp (4 lps on hook), yo, draw through 2 lps (3 lps on hook), yo, insert hook in 2nd chain of beg ch-4, yo and pull up loop (5 lps on hook), [yo draw through 2 lps] 4 times (1 lp on hook), ch-1, sl-st to 4th chain of beg ch-4. (29 Trx).
Round 10: Ch-1, sc once in each st. Join with sl-st to first sc. (86 sc). (
Hint: each Trx of previous round receives three sc - one in the top of the right leg, one in the middle of the two legs, and one in the top of the left leg). Finish off Colour A.
Round 11: Attach Colour B in any sc of round 10. Ch-1, *sc in each of the first four sts, 2 sc in next st.* Repeat from * to * all the way around. Finish off the round with one additional sc, then join with a sl-st to first sc. (103 sc). Finish off Colour B.
Round 12: Join Colour A in a sc that is in line with the centre of one of the six shells from round 3 (
this will ensure that your centre motif is straight inside your finished square). Ch-3, one dc in each of the next 12 sts, *tc, tc, (2tc, ch-2, 2tc) in the next st, tc, tc, one dc in each of the next 21 sts*. Repeat from * to * 3 times (ending with 9 dc in the last repeat). Sl-st to top of beg ch-3. Finish off colour A.
Round 13: Join Colour B in any dc of round 12. Ch-1, one sc in each st all the way around, and (2 dc, ch-2, 2 dc] in each corner ch-2 space. Join with sl-st to beg sc. Finish off Colour B. (Special note: no, that is not a typo. This round is all sc, except the corners which are dc).
Round 14: Join Colour A in any sc of round 13. Ch-3, dc in each st, and [2 dc, ch-2, 2 dc] in each corner ch-2 space. Join with sl-st to top of beg ch-3. Finish off Colour A.
Round 15: Join Colour B in any dc of round 14. Ch-1, sc in each st, and [2 dc, ch-2, 2 dc] in each corner ch-2 space. Join with sl-st to beg sc. Finish off Colour B.
Weave in all ends and you're done!
*(21 January 2010). Special thanks to HappyPeacock and Margate of Ravelry for pointing out a few typos on my original!

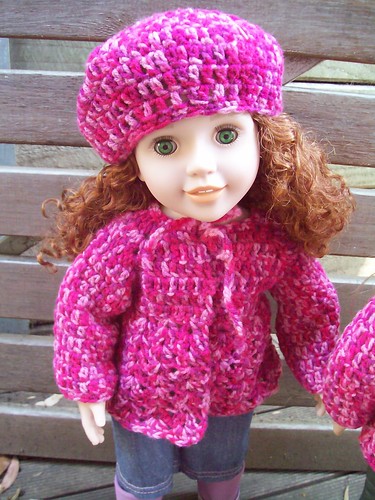
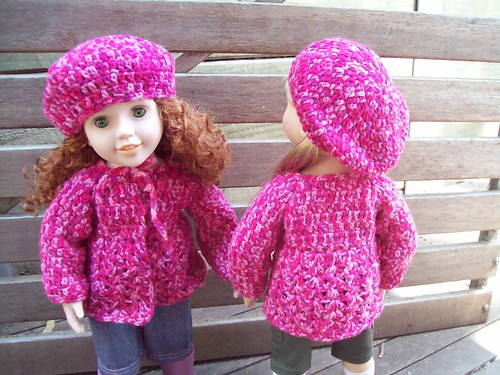 These were made with Carnival 8ply acrylic in a variegated pink colourway with a 4mm hook. It took about 150 grams to complete the two sets (1.5 balls). The berets are just improvised and the cardigans are from the pattern Premie Angel Shell Sweater by Beth Parson.