Saturday, August 28, 2010

Woolly's Snowflake Square - Free Crochet Patterns

On a recent crochet retreat, one of the members (1woollywombat) shared a beautiful crochet blanket she found at an op shop for only $3 or $4! It's a beautiful blanket and I really love the squares it used.

Later that night I set about trying to replicate the square while I had the original in front of me - I reckon I got it spot on, or at the least, very darn close!

I used a 4mm hook and approximately 8ply yarn (DK weight) which gave me a perfect 6 inch square. I reckon if you were to make it with a worsted weight/10ply yarn and a 5mm hook, it would give you an 8 inch square.

Please be advised, I am NOT claiming credit for this square, and I am NOT claiming to have designed it. Unfortunately I just don't know the origins of the square and/or if a pattern for the original exists somewhere out there.

Woolly's Snowflake Square - FREE Crochet Pattern
6 inch / 8 inch version

snowflake 006
snowflake 001

To make the 6 inch version, use a 4mm hook and 8ply (DK weight) yarn
To make the 8 inch version, use a 5mm hook and 10 ply (worsted weight) yarn

Stitches Used
Ch = chain
Sl-st = Slip Stitch
SC = Single Crochet
DC = Double Crochet
V-Stitch = DC, ch-1, DC (into same stitch or space)
Double-V-Stitch = 2DC, ch-2, 2DC (into same stitch or space)
Triple-V-Stich = 3DC, ch-3, 3DC (into same stitch or space)

Ch-6. Sl-st to first ch to form a ring.

Round 1: Ch-3. 15 DC into ring. Sl-st to top of beg ch-3. (16 DC made).

Round 2: Sl-st between any two DC of round 1. Ch-4, then DC in the same space (counts as first V-stitch). *Skip next 2DC and V-Stitch between DCs.* Repeat from * to * 6 times. Sl-st to 3rd ch of beg ch-4. (8 V-Stitches made).

Round 3: Sl-st to ch-1 space of any V-Stitch from round 2. (Ch-3, DC, ch-2, 2DC) into same Ch-1 space (first Double-V-Stitch made). *Double-V-Stitch in next ch-1 space.* Repeat from * to * 6 times. Sl-st to top of beg ch-3. (8 Double-V-Stitches made).

Round 4: Sl-st to ch-2 space of any Double-V-Stitch from round 3. (Ch-3, 2DC, ch-3, 3DC) into same ch-2 space (first Triple-V-Stitch made). *Triple-V-Stitch into next ch-2 space.* Repeat from * to * 6 times. Sl-st to top of beg ch-3. (8 Triple-V-Stitches made).

Round 5: Sl-st to ch-3 space of any Triple-V-Stitch from round 4. (Ch-3, 3DC, ch-2, 4DC) into the same ch-3 space (corner made). *8DC in next ch-3 space (side made). (4DC, ch-2, 4DC) in next ch-3 space.* Repeat from * to * 2 times. 8 DC in the last ch-3 space. Sl-st to top of beg ch-3. (4 corners & 4 sides made).

Round 6: Sl-st to any corner ch-2 space. (Note: with the exception of the corners, where you will be working into the chain spaces, all other stitches in this round are worked BETWEEN the stitches... this is what will give the previous round the spikey/snowflake-like appearance).

(Ch-3, DC, ch-2, 2DC) in the same corner space. *Now, do a SC between, the next 2 sts, HDC between the following two sts, and DC between the next two sts. DC between the group of 4 DC and 8 DC. Working between the stitches of the next 8 DC, you will do the following 7 stitches. DC, HDC, SC, SC, SC, HDC, DC. Now DC between the group of 8 and the next group of 4. Between the next 4 DC, you will DC, HDC, SC respectively. This takes you to the next corner ch-2 space. (2DC, ch-2, 2DC) in the corner space.* Repeat from * to * for each side. Sl-st to top of beg ch-3.

Round 7: Sl-st to any corner ch-2 space. (Ch-3, DC, ch-2, 2DC) in same space. DC in each st from previous row. In each corner ch-2 space (2DC, ch-2, 2DC). Continue around square. Sl-st to top of beg ch-3. Finish off.

10 OR 12 INCH VERSION - (Extended Remix Version)
12inchwoollysquare
As much as I love the square, I have a blanket of 12 inch squares, so I decided to keep going and create what I like to call the "extended remix."

To make a 10 or 12 inch version of this square, complete all of the instructions for the 6 or 8 inch version then continue on with rounds 8 - 11. Using a 4mm hook and 8ply (DK weight) yearn should give you a 10 inch square. Using a 5mm hook and 10 ply (DK weight) yarn should give you a 12 inch square.

Round 8: Sl-st to any ch-2 corner space. (Ch-3, DC, ch-2, 2DC) in same corner space. *Skip the next two DC of round 7 and V-stich into the third DC. Skip one st. V-stitch - repeat. Skip the last two DC of the side and (2DC, ch-2, 2DC) into the corner ch-2 space.* Repeat from * to * for the remaining three sides. (You should end up with 10 V-stitches on each side - not counting the corner stitches).

Round 9: Repeat row 8.

Round 10: SC in every stich of row 9 and (2SC, ch-2, 2SC) in each corner.

Round 11: Repeat row 10

I hope all of the instructions make sense - I'm a bit under the weather as I post this, so they make sense TO ME... hopefully they'll make sense to you, too! :)

Wednesday, July 7, 2010

Facewasher Frenzy

When I was in the US in May, Joann's had a sale on Peaches N Cream and Sugar N Cream cotton. I LOVE that stuff, and it is hard and/or expensive to get here in Australia. Needless to say, I stocked up. And when I say stocked up, I mean STOCKED UP! Let's just say, it wouldn't all fit in one of the Joann's supersized shopping bags.

I'm a big fan of cotton - it's soft, it's breathable, no one is allergic to it. Lots of lovely reasons. But to be honest, I've never really understood the whole crochet or knitted dishcloth/washcloth/facewasher thing.

I once made a crocheted dishcloth out of corn fibre (I really got a kick out of the idea of washing my food off my dishes with... well, food!). Unfortunately I only had a little bit of the corn remainging from a scarf project so the dishcloth was pretty small. Too small. Second, my husband doesn't like the idea of a crochet dishcloth - he thought it was to Nanna-esque and he kept hiding it under the sink! Hmm, so much for that.

While I was overseas, I crocheted a few washcloths to give me something to do while relaxing. I decided I'd go ahead and use up a few of the "orphan" balls I'd rescued. (An orphan ball is a ball of yarn where there is only one of that particular colourway left in the shop. I always feel bad for that ball, figuring no one is going to want to buy it because, really, who buys only one ball of something?)
Anyhoo, after making said washcloths, I started using them in the shower. Hey, these are pretty nice. I think I get it now! They're soft yet scrubby. And it's kind of cool using a washcloth that you made.
It's currently winter here in Australia and quite cold. Most people would think it's the perfect time of year to work on nice heavy wool projects. Yes, in some respects it is. But my hands are soooo dry from this winter weather, that cotton is pretty much the only thing my hands feel like working with at the moment.

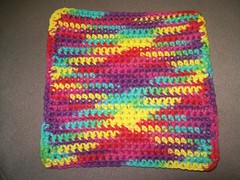
So first off was a birthday present for birthday swap. The recipient stated that she likes bright colours, so I worked up this little number for her.

I really liked the way it came out, and I still have half a ball left, so I made one for myself, too!

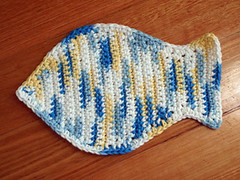
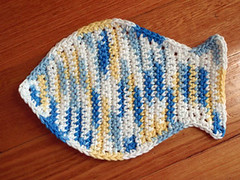
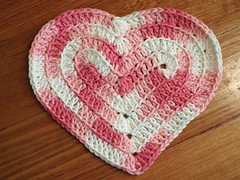
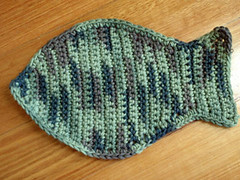
Then I went on to Ravelry and started looking up free dishcloth/washcloth patterns. I found a super cute Fish Washcloth Pattern and a cute little heart pattern, too. During the course of watching one TV show, I was able to whip out two little fishies in a blue, yellow and white colourway. I was then able to crank out a cute little pink and white heart.


When asking my husband what kind of washcloth he'd like me to make for him in the orphaned ball of camoflauge coloured cottoned I'd picked up for him, he chose the fish.


And I was so in love with the pink heart, I had to make another one.

One of the fish and one of the hearts are destined for gifts, but I'm looking forward to enjoying the other two myself.

Thursday, July 1, 2010

Face Case

I was really tempted to call it Head Case but at least you get the rhyming with Face Case. :)

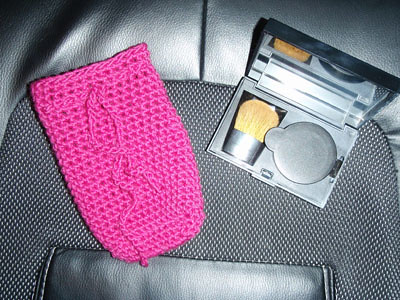
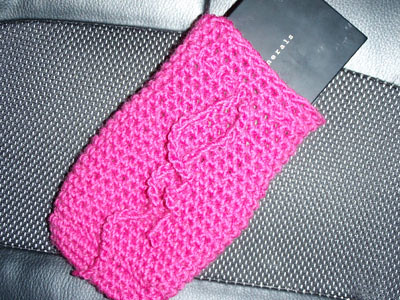
I made this little bag to keep my new mineral makeup travel compact safe and secure while floating around in my handbag. I love the fun bright pink colour - which also makes it easy to locate.

The case protects the compact from getting scratched up and I don't have to worry about it accidentally popping open when it shouldn't.

Girkey

My apologies to Lion Brand, it’s not the pattern… it’s me. I really really stink at making amigurumi. In fact, I should be banned from doing so again in the future.

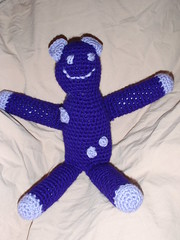
This “creature” started out as a giraffe, and then ended up looking like some weird monkey-like creature… I have therefore renamed him “Girkey” (pronounced Jerky).

I made this for a swap partner who likes amigurumi and giraffes, but dislikes the colour brown. I thought I’d be clever and make it for her in one of her favourite colours… purple. That was my first mistake.

After I’d completely finished the body, I realised that it wasn’t looking very giraffe-like. It seems I’d forgotten to do rows 14-25 (aka “the neck”). Second mistake.

I was running out of time to finish and get this posted off in time, so I decided to make my own decorations/embellishments and turn it into a slighly different creature. Yep. That was my third mistake.

And the fourth and worst mistake of all? The face. I really don’t have the knack for making cute faces. My husband wasn’t lucky enough to see this “creation” in person, but when I showed him the photos he remarked “That looks like something out of some poor kid’s nightmare.” Under other circumstances I may have been insulted, but unfortunately he was 100% right.

Tuesday, June 22, 2010

White & Silver Ballroom Scarves

There is a really fun sparkly yarn available from Spotlight called Moda Vera Ballroom. The problem? It's usually $8.99 for a 50 gram ball. That's a little bit rich for me, especially for an unknown, potentially "disastrous-to-work-with" ball of yarn.

It's always looked quite intriguing and I've been eyeing it off every time I go to Spotlight, but it's never been on sale... until recently! Back in May, Ballroom was FINALLY on sale - time to play :)
I'm not really a bling/sparkly kind of person, but I thought my younger nieces might each enjoy a sparkly scarf. I bought two balls of the white with silver Ballroom. I was able to squeeze one scarf out of each 50 gram ball for a total of two scarves. They were a quite skinny (which I liked), but a bit shorter than I would have preferred. Luckily they were for kids :)

I just made the scarfs out of a loose double crochet to help show off the silver sparkles of the yarn and give the blingy bits room to shine through.

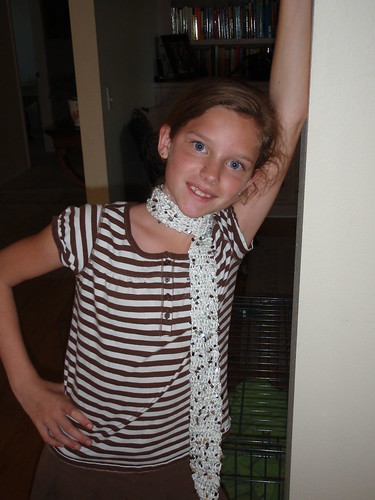
I forgot to take any pictures of the actual scarves, but fortunately I snapped this pic of Niece10 modelling one of them.

Thursday, June 17, 2010

More Kool-Aid Dyeing

Sunday mornings seem to be a good day for my microwave dyeing. My husband dislikes the smell of the cooking wool, so I can "stink up the house" while he is away at the fire brigade. :)

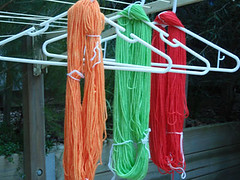
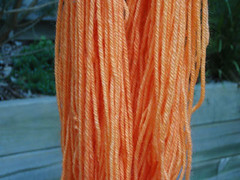
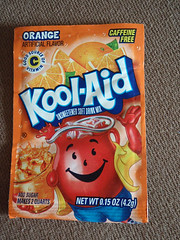
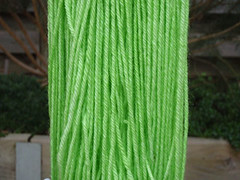
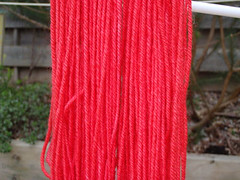
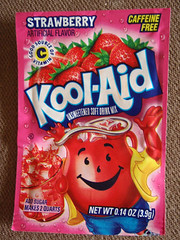
This past Sunday I did some more Kool-Aid dyeing... this time with the "real" stuff. I dyed 50 grams each of orange, lemon-lime and strawberry. I used two packets per 50 grams of wool. Here are the results I got...


I'm happy with how the colours came out. And as always with Kool-Aid dyeing, you get the added bonus of a fainty yummy fruity smell at the end.


Monday, June 7, 2010

Walmart's Generic Great Value Kool Aid

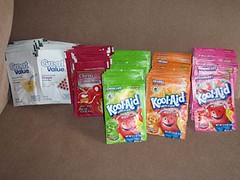
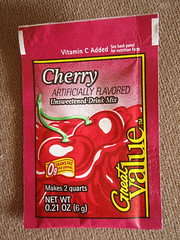
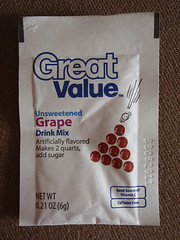
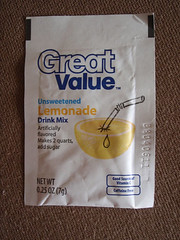
On my recent trip to the US I decided to stock up on Kool Aid for wool dyeing. As luck would have it, I happened to do my Kool Aid shopping while I was at Walmart. In addition to Strawberry, Lemon-Lime and Orange Kool Aid brand, I also decided to pick up some of Walmart's generic "Kool Aid" in cherry, grape and lemonade.


I can't remember the exact price of the Kool Aid versus the Walmart brand, but it was definitely a significant savings. Maybe somewhere in the neighbourhood of half the price? Well, for that kind of savings, I figured it was worth a go. Plus a lot of generic brands are made in the exact same factories as the name brand stuff - so who cares what the package says?

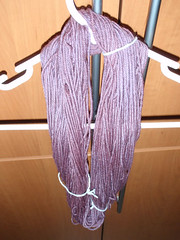
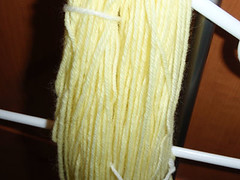
Yesterday was a rainy Sunday afternoon, so I thought it would be a good opportunity to get some trial dyeing done. I dyed 50 grams each of the cherry, grape and lemonade. I used two packets per each 50 grams... except for the lemonade. After putting two packets of lemonade in, the water was still extremely light in colour. I decided to put in four packets instead to make it more yellow.

Here are my dyeing results...